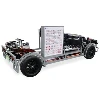
Take the disassembly and assembly of the front suspension of Shanghai Santana as an example:
1. Remove the wheel trim cover.
2. When the wheel is on the ground, remove the fastening nut between the hub and the drive shaft, and then remove the wheel.
3. Remove the brake caliper, take off the brake disc; remove the brake hose bracket, fix the brake caliper assembly on the body with iron wire, be careful not to remove and damage the brake hose.
4. Remove the fastening bolts between the shock absorber strut housing and the hub.
5. Use a tensioner to press out the tie rod joint from the shock absorber strut housing.
6. Remove the stabilizer bar and the nut on the drive shaft and hub from under the lower swing arm. Press down on the front suspension swing arm and pull the driveshaft out of the wheel bearing. If it can't be pulled out, it can be pressed out with a press.
7. Remove the cover, hold the lower part of the shock absorber strut, fix the slide column with a special tool, and remove the nut on the shock absorber. The shock absorber assembly with spring can be removed.
8. Disassemble the shock absorber assembly with spring, compress the spring, slot the nut and nut cover with a wrench and special tool.
Remove the spring.
9. Clamp the knuckle arm in a vise. Remove the shock absorber fixing nut and pull out the front shock absorber.
10. Press out the hub bearing. Remove the brake disc, remove the fender, press out the hub, remove the retaining ring from the strut housing, press out the wheel hub bearing toward the retaining ring, and pull out the bearing inner race with a puller.
The disassembly of the front suspension of Jetta car as an example
(1) Removal of wheel and steering knuckle
1) Loosen the tire bolts
2) Remove the wheel
3) Remove the front brake
4) Separate steering knuckle and front shock absorber
5) Remove the steering knuckle
(2) Decomposition of steering knuckle
1) Remove the bearing inner ring from the hub
2) Remove the bearing from the steering knuckle
(3) Disassembly and disassembly of the front shock absorber
(4) Disassembly and disassembly of the trapezoidal arm
1) Remove the trapezoidal arm
2) Take out the front and rear bushings of the trapezoidal arm
(5) Disassembly and disassembly of the universal joint shaft
1) Remove the gimbal from the car
2) Decomposition of the universal joint shaft: remove the outer constant velocity universal joint guard, remove the outer constant velocity universal joint, remove the inner constant velocity universal joint, and press out the vibration buffer of the universal joint shaft.
3) Decomposition of the external constant velocity joint: the marking before the dismantling of the external constant velocity joint and the dismantling of the steel ball, the disassembly of the external constant velocity joint cage and the ball hub, the separation of the external constant velocity joint cage and the Ball Yi.
4) Decomposition of the inner constant velocity joint: disassemble the steel ball of the inner constant velocity joint, and remove the inner constant velocity joint for perseverance.
Installation of front suspension of Jetta
Installation is performed in the reverse order of removal, but the following must be noted:
Installation of subframe, stabilizer bar and trapezoidal arm: assembly of front bushing of trapezoidal arm, assembly of rear bushing of trapezoidal arm, installation of subframe, trapezoidal arm and lower ball joint, installation of stabilizer bar.
Assembly of steering knuckle and wheel: Installation of steering knuckle bearing.
Installation of steering knuckle and front shock absorber: assembly of steering knuckle and front shock absorber, installation of steering knuckle and trapezoidal arm, installation of front shock absorber
Assembly of the universal joint:
Assembly of external constant velocity joints.
Assembly of the inner constant velocity joint: installation of the ball hub, installation of the steel ball and the protection frame, and the installation of the cage. Assembly of the universal joint shaft: the assembly of the outer constant velocity joint and the circumference of the universal joint, the installation of the vibration buffer, the assembly of the inner constant velocity joint and the universal joint shaft, the protective cover of the inner constant velocity joint installation. The installation of the universal joint shaft: the installation of the universal joint shaft and the drive flange of the main reducer, the installation of the universal joint and the wheel, and the inspection of the wheel bearing clearance.
Wheel installation: brake caliper and brake disc installation, wheel installation.
Measurement and Adjustment of Front Wheel Alignment Angle
(1) Measurement of front wheel angle
(2) Measurement and adjustment of front wheel alignment angle
1) Check the conditions
2) Toe-in measurement and adjustment
3) Measurement and adjustment of wheel camber
4) Adjustment of kingpin camber angle and caster angle
Installation of rear suspension of Jetta
Installation is performed in the reverse order of removal, but there are a few things to keep in mind:
(1) Assembly and installation of the rear axle body: Install the rear axle body rubber support, install the bracket and the rear axle body, and install the rear axle body.
(2) Assembly and installation of the rear shock absorber
1) Install the rear shock absorber
2) Connect the rear axle body to the rear shock absorber
(3) Installation of short shaft and bearing
1) Install the outer ring of the outer ring tapered roller bearing of the brake drum
2) Install the outer ring of the tapered roller bearing on the inner ring of the brake drum
3) Install the oil seal of the brake drum
4) Install the short shaft
5) Install the brake drum
6) Adjust the bearing wheel-like preload
7) Install the locking ring cotter pin
8) Install the grease cap
(4) Inspection of rear wheel alignment angle of Jetta
1) Check the rear wheel camber
2) Check the rear wheel toe
Precautions for disassembly and assembly of car suspension
(1) The front suspension assembly cannot be welded and repaired.
(2) The self-locking nut must be replaced with a new one.
(3) The tightening torque of nuts or bolts should meet the regulations.
(4) Grease should be applied before the hub bearing is pressed in, and the difference between the opening positions of the two retaining rings is 180
(5) For those with hydraulic steering, apply 5mm wide sealant on the splines of the drive shaft, and drive after 60 minutes.